Rucking 101: Why Walking With Weight Might Be the Best Workout You're Not Doing

Rucking is one of those rare workouts that looks almost too simple to matter. You put weight on your back, and you walk. That’s it. But that simplicity is exactly why it works — and why it has quietly become one of the most effective, accessible, and time-efficient ways to build strength and endurance at the same time. Whether you’re already active or looking for something that fits into a busy life, rucking deserves a spot in your training.

Here’s everything you need to know to get started, progress safely, and get the most out of weighted walking.

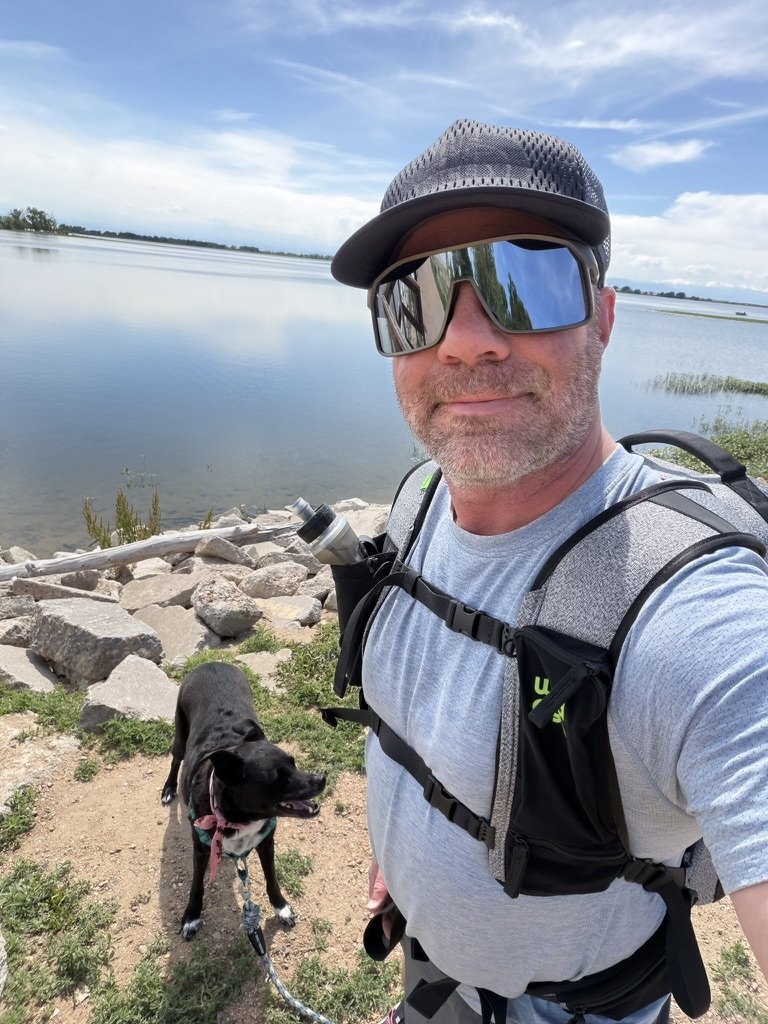
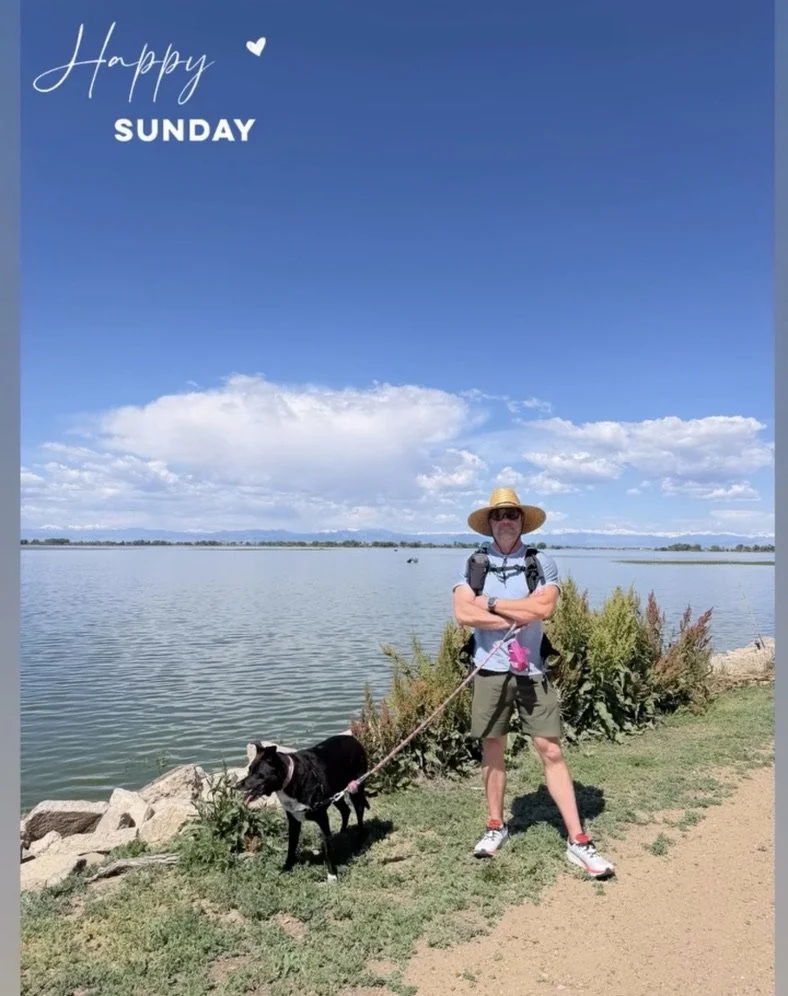
Rucking with our dog Chloe

What Is Rucking?

The term comes from “rucksack.” At its core, rucking just means walking with a loaded pack or weighted vest. It started in the military as a way to build the durable, all-day endurance soldiers need, but it has since crossed over into mainstream fitness because the payoff is so high for the effort involved.

What makes rucking special is that it bridges two worlds that usually require separate workouts. Walking is great cardio but does little for strength. Lifting builds strength but isn’t cardio. Rucking does both at once — you get a real cardiovascular workout while your muscles and bones work under load, all in a single low-impact session you can do almost anywhere.

The Benefits: Why It’s Worth Your Time

Adding weight dramatically increases the metabolic cost of walking. Research has found rucking can burn meaningfully more calories than walking at the same pace — a 150-pound person carrying 20 pounds can burn in the ballpark of 400 to 500 calories per hour. You’re covering the same ground as a normal walk but getting far more out of it.

Carrying load also engages your core, back, shoulders, and legs continuously. Over time this develops what’s sometimes called postural endurance — the ability to hold good alignment for long stretches — which translates directly into less back pain and better everyday function.

Rucking is great for your bones, too. Bone responds to mechanical stress by getting stronger, and weighted walking provides exactly that stimulus. A frequently cited five-year study in post-menopausal women found that weighted-vest walking helped maintain hip bone density while a non-weighted group lost bone mass. Since bone loss tends to begin after age 30, this matters for almost everyone.

It’s joint-friendly, as well. Unlike running, rucking keeps both feet moving in a low-impact stride, so you get cardio and strength benefits without the repetitive pounding that sidelines a lot of runners.

And it’s simple and social. No gym, no class schedule, no complicated technique. You can ruck on a trail, around your neighborhood, or on your lunch break — and it’s easy to do with a friend or group while you talk.


How to Get Started

The number one rule of rucking is to start lighter than you think you need to. The activity feels deceptively easy for the first ten minutes, and people routinely overload on day one and end up with sore shins, knees, or lower back.

For gear, you have two main options. A sturdy backpack with a padded hip belt works perfectly to begin with — just load it with something stable like a wrapped dumbbell, a weight plate, or even a few water bottles or sandbags, positioned high and tight against your back so they don’t bounce. A dedicated weighted vest is the other option; it sits snug against your torso and distributes load evenly front and back, which many people find more comfortable for shorter or faster sessions.

A sensible first outing looks like this: start with about 10 pounds, or roughly 5 to 10 percent of your body weight, and walk for 15 to 30 minutes on flat ground. Keep your posture tall, shoulders back, eyes up, and your stride natural. You should be able to hold a conversation. If anything sharp shows up in your knees, shins, or low back, take the weight off and reassess your form before adding it back.

Chloe enjoying the smell of the lake, and me enjoying the 40lb load in a ruck pack

How to Progress

Progression is where rucking really pays off, and the key is to change only one variable at a time — add time and distance first, then weight. A sensible arc for a beginner looks like this: spend the first week or two at 10 to 12 pounds for 20 to 30 minutes on flat terrain, two or three times a week. Over the next couple of weeks, build toward 45 to 60 minutes at the same weight and add a few gentle hills. From there, once an hour feels manageable, begin nudging the weight up toward 10 to 15 percent of your body weight, and eventually 20 percent or more as you become more experienced.

The principle is patience. Let your tendons, joints, and connective tissue adapt at their own pace, which is slower than your muscles and cardiovascular system. Adding a little time each week and only bumping the weight once a session feels genuinely easy will keep you progressing for months without injury.

Weighted Vest vs. Ruck: Which Should You Use?

Both work, and the right choice depends on the session. A weighted vest keeps the load tight and evenly balanced, making it ideal for shorter, more intense walks, intervals, or adding resistance to bodyweight workouts. A rucksack carries the weight a little higher and farther from your body, which suits longer efforts, hills, and heavier loads where a backpack’s hip belt helps transfer weight off your shoulders.

Rucking together as a family - Sami with a 12lb vest, Chloe with a small vest, and me with 40lb ruck pack by Wild Gym

A simple rule of thumb: reach for the vest for quick, snappy sessions under about 45 minutes, and the ruck for longer walks, hilly terrain, or anytime you’re carrying heavier weight. If you’re only going to buy one piece of gear to start, a quality backpack you already trust is the most flexible and budget-friendly entry point. Fixed-weight vests are convenient, but a plate-loaded system is the smarter long-term investment once you know you’re committed.

A Few Final Tips

Wear supportive shoes with good traction — trail shoes or sturdy sneakers both work. Hydrate as you would for any cardio session, especially in Colorado’s dry, high-altitude climate, where it’s easy to underestimate fluid loss. Warm up with a few minutes of unloaded walking before you add weight. And listen to your body: rucking should leave you pleasantly worked, not wrecked.

Rucking rewards consistency more than intensity. Two or three steady sessions a week, progressed patiently, will build strength, endurance, and bone health that compounds over time. Load up, stand tall, and start walking — your future self will thank you.

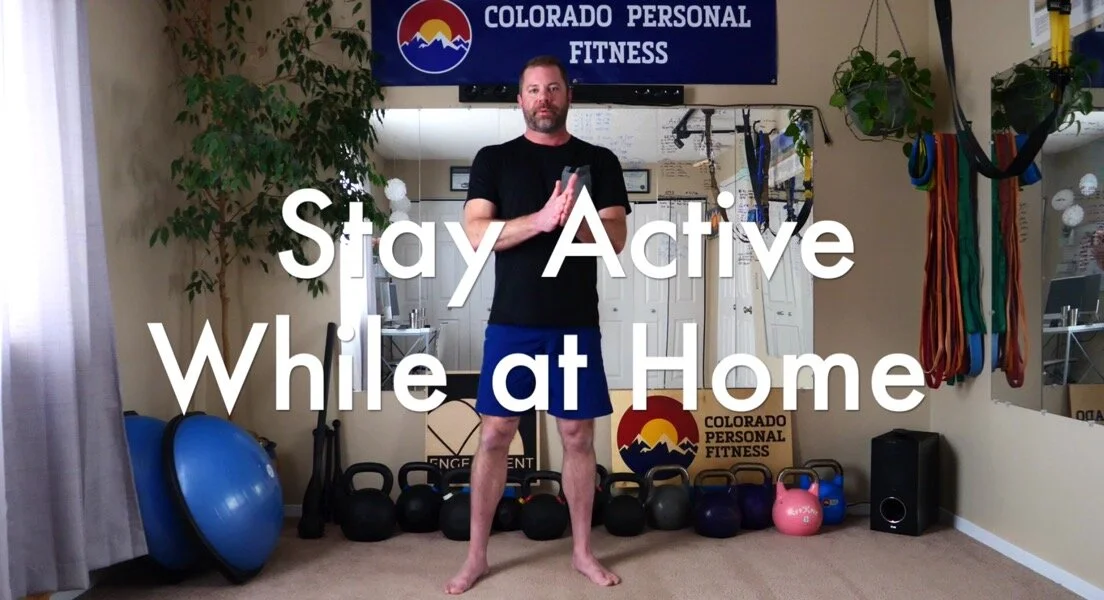
Want help building rucking into a personalized program? The team at Colorado Personal Fitness can help you start safely and progress with confidence.

Ski Legs Don't Hike: A Colorado Trainer's Guide to the Spring Training Transition

Ski Legs Don't Hike: A Colorado Trainer's Guide to the Spring Training Transition

Published April 23, 2026 | By Sean Sewell, NSCA-CPT | Colorado Personal Fitness

Estimated read: 6 minutes

The Colorado spring training transition is the eight-to-twelve week block between the last ski day in May and the first big hike or 14er in July, during which skiers and splitboarders have to intentionally rebuild their aerobic base, ankle mobility, and long-duration endurance before the ground hardens under a summer pack. It's the period most Colorado athletes skip — and it's the single biggest reason so many hikers, runners, and bikepackers limp home from their June trips wondering what happened.

Here's the short version: ski legs don't hike. The same quads that felt bulletproof carving Vail bowls in March cramp up at 11,000 feet in June. This guide is the training plan I put my own Colorado Personal Fitness clients on the moment the chairs stop spinning.

Why your ski legs aren't hiking legs

Downhill skiing is a sport of short, intense, mostly-anaerobic bursts with long rests on the lift. Your quads and glutes get very strong at eccentric loading (absorbing force on the way down), your core gets good at rotational stability, and your aerobic system gets a real but uneven workout depending on how much backcountry touring you did.

Hiking — especially Colorado hiking, which almost always means uphill at altitude — is a completely different demand:

  • Long-duration aerobic steady-state (2 to 10+ hours)

  • Concentric force production pushing up stairs, rocks, and switchbacks

  • Calf and posterior-chain endurance that skiing doesn't touch

  • Ankle mobility and stability across uneven terrain, something ski boots actively suppress for five months

  • Altitude-adapted aerobic capacity that degrades faster than most people realize after a few months off the trails

If you jump from your last powder day straight to a 14er attempt, your cardiovascular ceiling is fine, but your specific musculature and ankle architecture are not. The training transition is how you bridge that gap.

The 8-week spring transition framework

Here's the framework I use with clients, built around four phases. Adjust based on whether you're targeting 14ers (longer), technical scrambles (more ankle work), or bike-heavy summers (less calf focus, more posterior chain).

Weeks 1–2: Decompress and mobilize

After ski season, your hip flexors, calves, and thoracic spine are locked up from boots and layers. Don't train hard yet. Train mobile.

  • 3x per week: 20-minute mobility flow — TRX hip openers, ankle rockers, thoracic rotations

  • 2x per week: 30–45 minute Zone 1 walking (60% max HR), flat terrain

  • 1x per week: light full-body kettlebell circuit, nothing above RPE 6

Weeks 3–4: Rebuild the aerobic base

Now you start putting in the unglamorous aerobic work that actually carries 14er summits.

  • 2–3x per week: Zone 2 cardio, 45–75 minutes, nose-breathing pace (roughly 70% max HR). This is the single most-skipped training zone for Colorado outdoor athletes. Don't skip it.

  • 2x per week: full-body strength with kettlebells + TRX. Focus on single-leg work (reverse lunges, step-ups, split squats) and carries (suitcase, farmer's, overhead).

  • 1x per week: ankle and calf-specific work — calf raises (3 x 20), tibialis raises (3 x 15), single-leg balance work (30 seconds each side, eyes closed).

Weeks 5–6: Add vertical

This is when the trails dry out in the Front Range and you start getting on real terrain.

  • 1x per week: weighted hike or uphill treadmill session. Start with 15 lbs in a pack, build to 25 lbs. 45–60 minutes.

  • 1–2x per week: Zone 2 cardio, now 60–90 minutes

  • 2x per week: strength, shifting emphasis to posterior chain — Romanian deadlifts, kettlebell swings, good mornings

  • Saturday: short local hike, 4–6 miles, under 2,000 ft elevation gain

Weeks 7–8: Specificity

Train the actual thing you're about to do.

  • 1x per week: long effort on real terrain — 6–8 miles, 2,500–4,000 ft elevation, pack weight matching target objective

  • 1x per week: Zone 2 cardio, 75–90 minutes

  • 2x per week: short strength sessions (30 min max) to maintain, not build

  • Recovery day: mandatory — foam roll, walk, hydrate, sleep

Five exercises that directly transfer

If you do nothing else, do these five. They're what I assign when a client calls me 4 weeks before a trip and asks what to do.

  1. Bulgarian split squat — 3 sets of 8 per leg. Builds the exact single-leg strength that carries you up switchbacks.

  2. Kettlebell swing — 5 sets of 15. Hinge pattern, posterior chain, aerobic-to-anaerobic bridge in one move.

  3. TRX pistol progressions — 3 sets of 6 per leg. Ankle mobility, balance, and single-leg strength.

  4. Suitcase carry — 4 sets of 60 seconds per side, heavy. Grip, core, and gait endurance for long days with a pack.

  5. Calf raises, single-leg, slow eccentric — 3 sets of 15 per leg, 3-second lower. The boring one nobody does. The one that stops June cramping.

What about the aerobic work at altitude?

If you live in Denver (5,280 ft), every Zone 2 session is already delivering some altitude adaptation. If you live at sea level and you're traveling to Colorado for a summer trip, give yourself at minimum 48 hours at elevation before your objective, hydrate aggressively (3+ liters/day), and reduce your first-day distance goal by about 30%. The training transition doesn't replace acclimatization — it just makes your acclimatization window more productive.

Frequently asked questions

How soon after ski season should I start this? Within 7–10 days of your last ski day. The longer you wait, the more base fitness you lose and the harder the ramp-up becomes.

Can I do this program on my own, or do I need a trainer? The framework works unsupervised if you already have good lifting form. If you're newer to kettlebells or TRX, one to three form-check sessions with a trainer saves months of inefficient reps. Book a consult with Colorado Personal Fitness.

I'm not doing 14ers — I just want to hike comfortably. Do I need all eight weeks? No. Weeks 1–4 alone will put you ahead of 90% of recreational hikers. Add weeks 5–6 if you're planning anything over 2,000 ft of gain.

What if my goal is mountain biking, not hiking? Replace the weighted hike with a long ride, keep the single-leg strength and core work, and add more rotational and grip exercises. The backbone of the program — Zone 2 base, single-leg strength, ankle mobility — still applies.

Do I need to stop skiing entirely during this? No. Spring corn days and late-season backcountry tours are fine. Just don't use them instead of your Zone 2 and strength sessions. Ski for joy; train for your summer.

The bottom line

Ski season builds a specific athlete. Hiking season demands a different one. The spring transition is where good Colorado athletes separate from the people limping off the trail in June clutching their calves.

If you want help customizing this framework to your specific goal, schedule, and current fitness, work with me directly at Colorado Personal Fitness. First session is always a full assessment — we map your real baseline before we change anything.

About the author

Sean Sewell is an NSCA-certified personal trainer, StrongFirst senior instructor (SFG, SFB, SFL), and AIARE Level 2–certified ski mountaineer based in Denver. He founded Colorado Personal Fitness in 2011 and has been training mountain athletes for over 15 years. Learn more about Sean.

Want monthly training breakdowns like this one delivered to your inbox? Sign up for the newsletter.

Neck, Shoulder, Elbow and Wrist Mobility in under 4 minutes

Neck, Shoulder, Elbow and Wrist Mobility in under 4 minutes

Here is a great series of mobility drills that will prepare your body for exercise and help get the kinks out. And it takes less than4minutes to do!

3 Way Neck Stretch - 3 reps each

Egyptians - 5 reps

Arm Circles - 5 reps

Cool Guy - 5 reps

Fist to palms - 5 reps

Fist Diamonds - 5 reps

Puppet Hands - 5 reps

Stay tuned for Hips, Knees, Ankle, and Feet Mobility Drill Video!

All of these can be done every day and do not require any equipment. The complete mobility drill series takes less than 10 minutes and can provide immediate benefit.

Give it a go and let me know if you have any questions!

I must give credit to Flexible Steel for these exercises. We recently hosted an Instructor Certification at our gym (Axistance Athletics - here in Denver, CO) where my friend and colleague Matthew Flaherty taught the course. This is just a sample of the drills from that certification. They are super helpful and really work!

New Gym! Moving Our Training Over to Axistence Athletics

We have a new home for our training! I am super stoked to announce that Colorado Personal Fitness is now working with the great coaches of Axistence Athletics!

The name of the gym and the faces may seem familiar. That is because the coaches - Ryan, Garrett, and Dan - have been in the Mountain Fitness School training videos (heck, they are shot at Axistence Athletics!) and have been in most of the continuing education certifications I have attended the last 5 years. In fact, Axistence has been the host to all of the recent StrongFirst courses - kettlebell, barbell, and advanced kettlebell.

I did a test run of training with a handful of current clients before making the announcement. The feedback from each of the clients was overwhelmingly positive! You will see why when you come it :)

Here is a video of the gym:

Ryan, Garrett and Sean at Axistence Athletics doing Mountain Fitness School Video

Ryan, Garrett and Sean at Axistence Athletics doing Mountain Fitness School Video

Learn more about Axistence Athletics here - Axistence Athletics

Benefits of the new space

  • Plenty of free parking

  • 5 times the space of the previous gym

  • clean and well ventilated

  • only 5 total trainers (instead of 15)

  • high-quality coaches that I respect and learn with

  • ample weight and training tools

  • structured personal training hours (so there is never more than a few people at a time in the gym)

  • outdoor training area

  • close to great coffee shop and brewery!

  • Vet owned!

  • Very awesome culture

  • it smells good :)

90% Off Mountain Fitness School

As we are all asked to stay home doing Theis COVID-19 pandemic, I wanted to give everyone the best tools to train at home. Safely, effectively and with minimal (or no) equipment. Simply enter code STAYFIT at checkout and the price will fo from $279 to $27.90!

There are over 60 students currently enrolled, and the results have been incredible. This is my way of giving back to all of you, and empowering you to stay healthy and fit. Especially now!

https://mountainfitnessschool.com/p/mountain-fitness-training-improve-backcountry-fitness-skiing-snowboarding-using-kettlebells-and-trx

Mountain Fitness Training.png


Stay Active While At Home

As many of us can not get to our gyms and fitness facilities, I thought it would be helpful to create a series of home workout videos. Here is the first in the series. This is a 10 minute workout you can do at home with no equipment.

The plan-

5 High Knees per leg

5 Butt Kickers per leg

5 High Knee grabs per leg

5 Elbows to Knees

3 way neck stretch - 3 rounds

10 Figure 8 wrists

5 Cool Guy Sunglasses

5 Not So Cool Guy Sunglasses

5 Egyptians

5 Air Squats

Hip Mobility Complex

5 Hydrants

5 Donkey Kicks (or Bird Dogs)

5 Internal Rotations

5 External Rotations

5 Glutei Bridges (or one leg hip raises)

5 wipers

Mountain Fitness School 1 Year Anniversary Sale!

To celebrate the 1 year anniversary of Mountain Fitness School, we are offering a significant discount.

Act now to take advantage of this program for the reduced price of $97 (down from $279!)

This program has helped people summit Denali, Rainer, remote volcanoes and you local ski hill. It is simple to do, takes little time and yields massive results. Join the other Mountain Fitness School members and attain your peak!